Windows Firewall for Network Camera Access
Some cameras that fluxEngine can talk to are reachable via the network. In order to be able to receive data from these cameras, exceptions must be added to any firewall software so that fluxEngine can receive the image from the camera.
In general an exception must be added with the following properties:
Application:
fluxDriverIsolation.exe(the path that will actually be used)Protocol: UDP
Port: any
Direction: incoming
The specific binary fluxDriverIsolation.exe that comes with
fluxEngine must be chosen for the firewall rule. See
Driver Isolation Framework for further details on where this file
is located.
Note
A typical error message that may occur when a firewall rule is not present is:
Could not negoatiate packet size.
Testing if the firewall is causing the issue
In order to quickly verify that it is indeed the firewall that is causing issues for fluxEngine being able to connect to cameras, temporarily disable the firewall completely and attempt the connection with fluxEngine again. If that solves the issue, the firewall is blocking the connection. In that case reactivate the firewall (to avoid leaving the system vulnerable) and add a specific rule for fluxEngine.
Windows Defender Firewall
In this section there is a step-by-step tutorial for adding the
firewall rule to the fluxDriverIsolation.exe that has been
installed together with the fluxEngine Python package, when using
Microsoft’s Windows Defender firewall. (If a customer uses a different
firewall, please consult the documentation of that firewall for
further details.)
If Python for Windows is installed in a user-specific directory,
fluxDriverIsolation.exe will be found under:
C:\Users\USERNAME\AppData\Local\Programs\Python\PythonVERSION\Lib\site-packages\fluxEngine\fluxDriverIsolation.exe
If Python for Windows is installed for all users, the binary will be found under:
C:\Program Files\PythonVERSION\Lib\site-packages\fluxEngine\fluxDriverIsolation.exe
Note
In the case of C/C++, the fluxDriverIsolation.exe binary
location will vary depending on the development and delpoyment
setup of the user (see Driver Isolation Framework), and they
must add such a rule for each location of
fluxDriverIsolation.exe that is relevant.
Step 1: Open the Windows Defender Firewall settings
Go to the start menu and start typing
Windows Defender Firewall with Advanced Security. The following
entry should be shown:
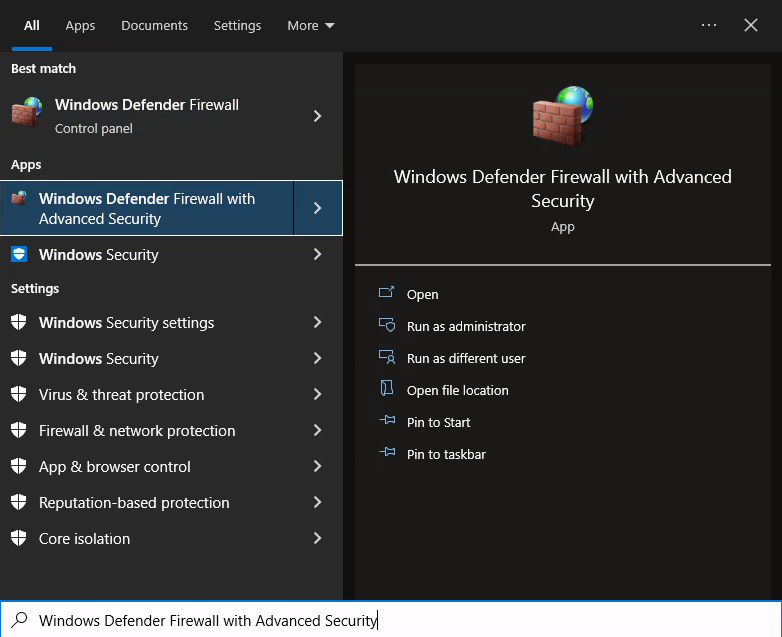
If the Windows installation is in a different language, the name of the settings application will be slightly different.
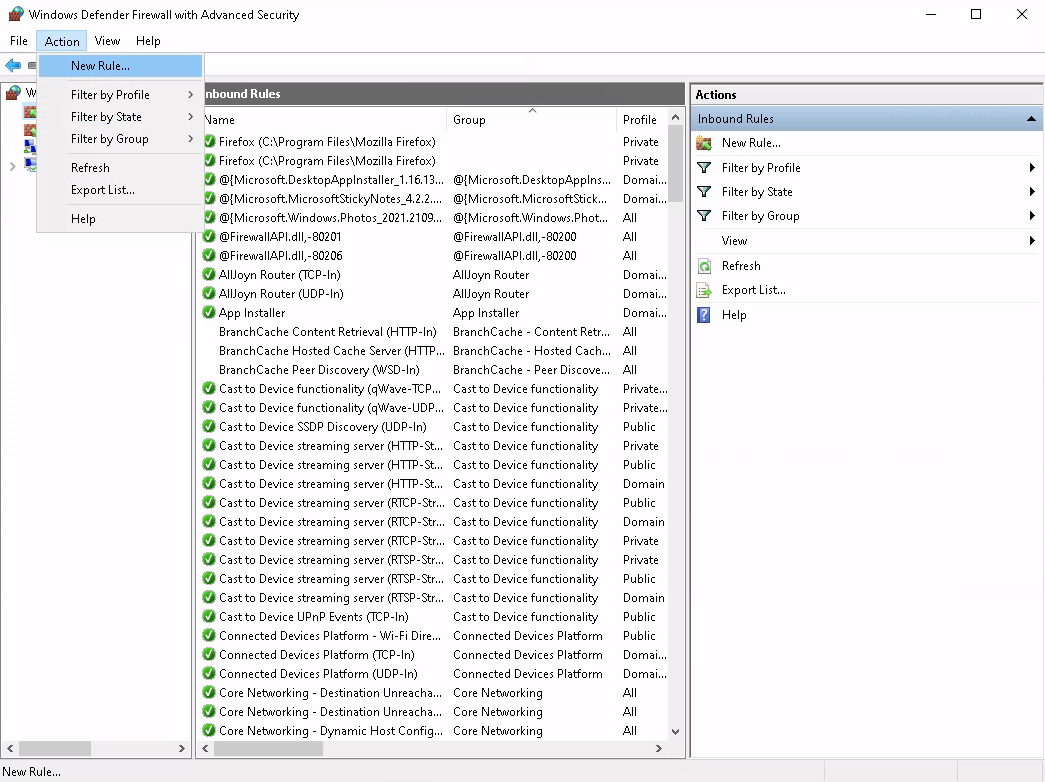
Step 2: Add a new firewall rule
Go to the menu Action and select New Rule... to create a new
firewall rule:
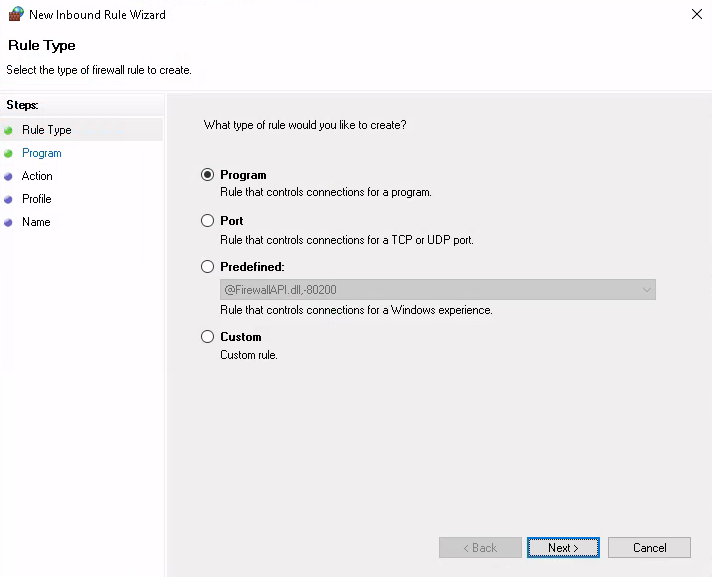
Step 3: Indicate that a program-based rule should be added
In the first wizard, select Program to indicate that a rule
specific to a program should be added to the firewall:
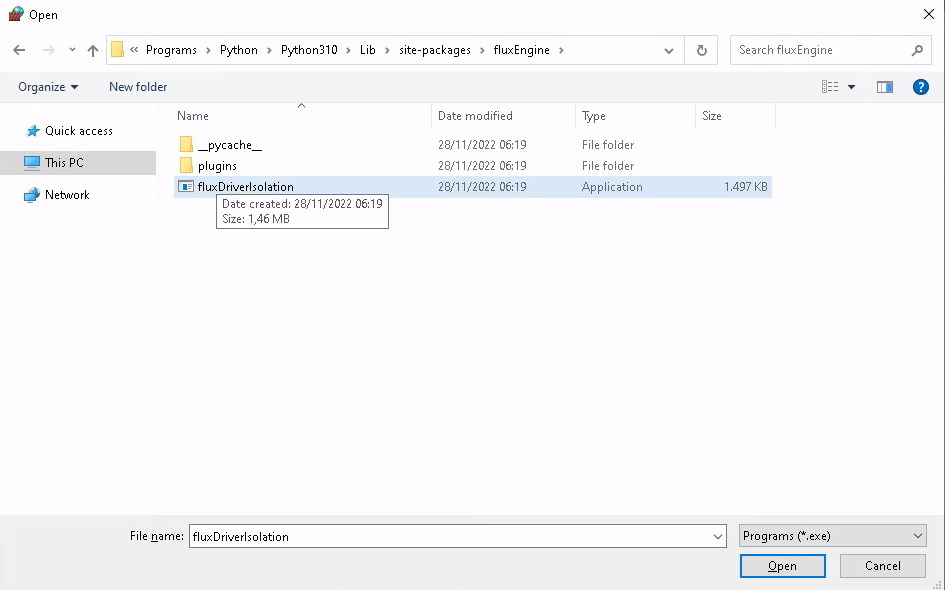
Step 4: Select the fluxDriverIsolation binary
Select the fluxDriverIsolation.exe binary from the directory. Note
that C:\Users\USERNAME\AppData may not be visible in the File
Explorer in the default settings.
Ensure that the file name is correct in the second page of the rules wizard:
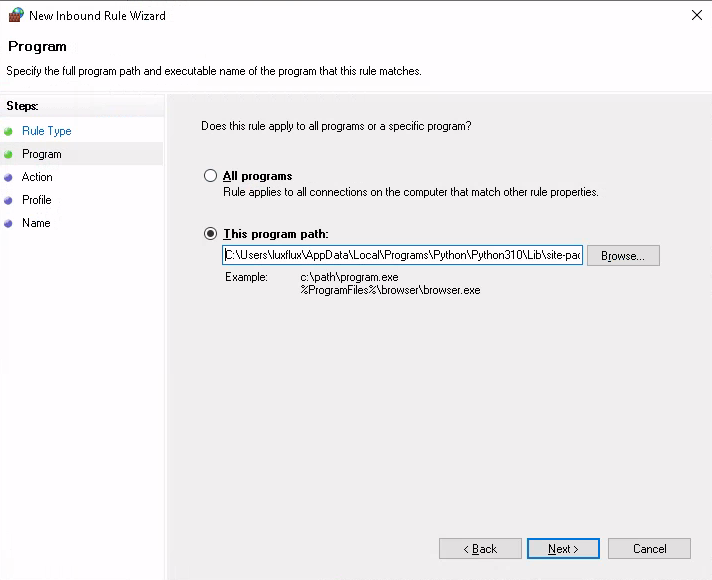
Warning
Windows will by default replace parts of the path with variables
such as %SystemDrive% or %USERPROFILE% after closing the
file selection dialog. If that happens it is essential that
that path is replaced by an absolute path; especially when
%USERPROFILE% is specified in the rule the rule will not
work properly. (The screenshot shows a correct path that includes
a drive letter.)
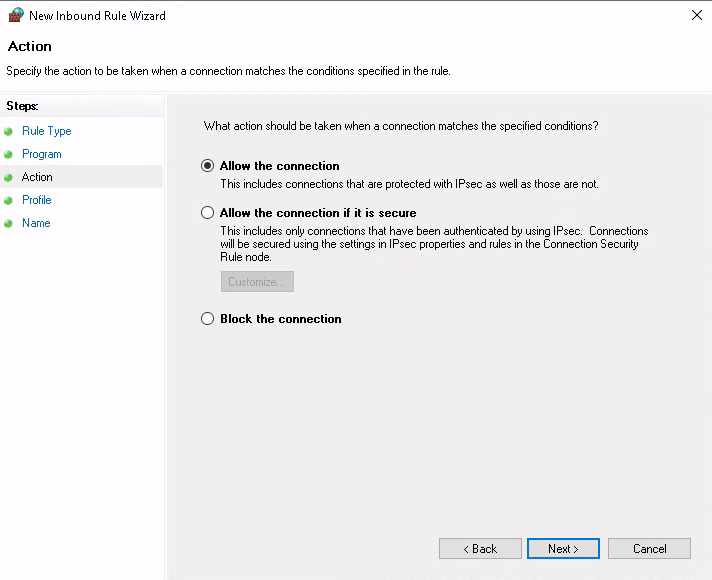
Step 5: Proceed with the wizard
Indicate that the connection should be allowed:
The rule should apply to all profiles:
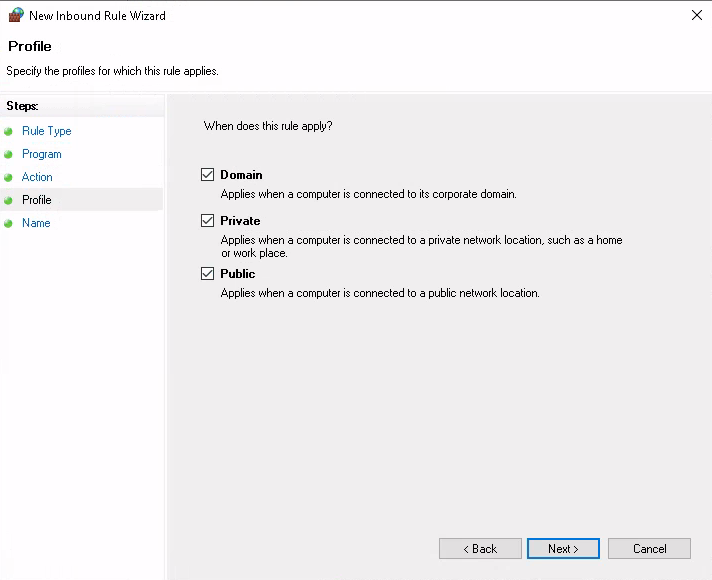
(If a user knows what they’re doing they may restrict the profile to a specific one, but which profile Windows assumes a network connection to be associated with may not be 100% stable, so allowing this for all connections is recommended.)
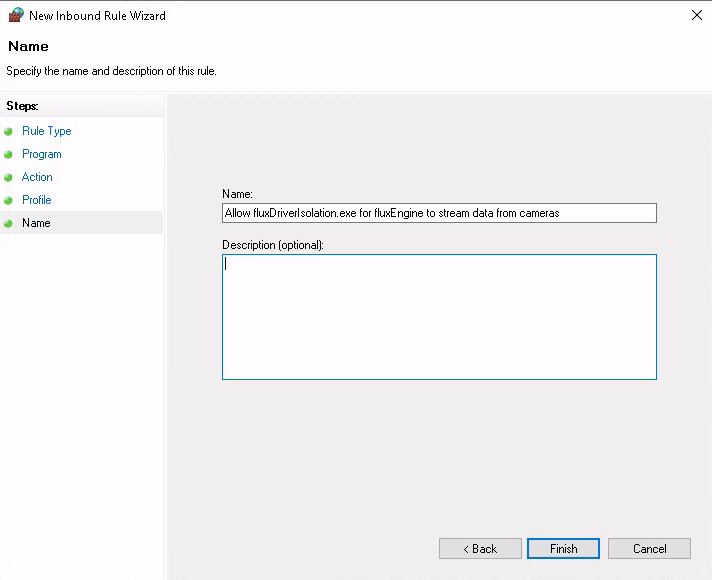
Finally, specify a speaking name for the rule:
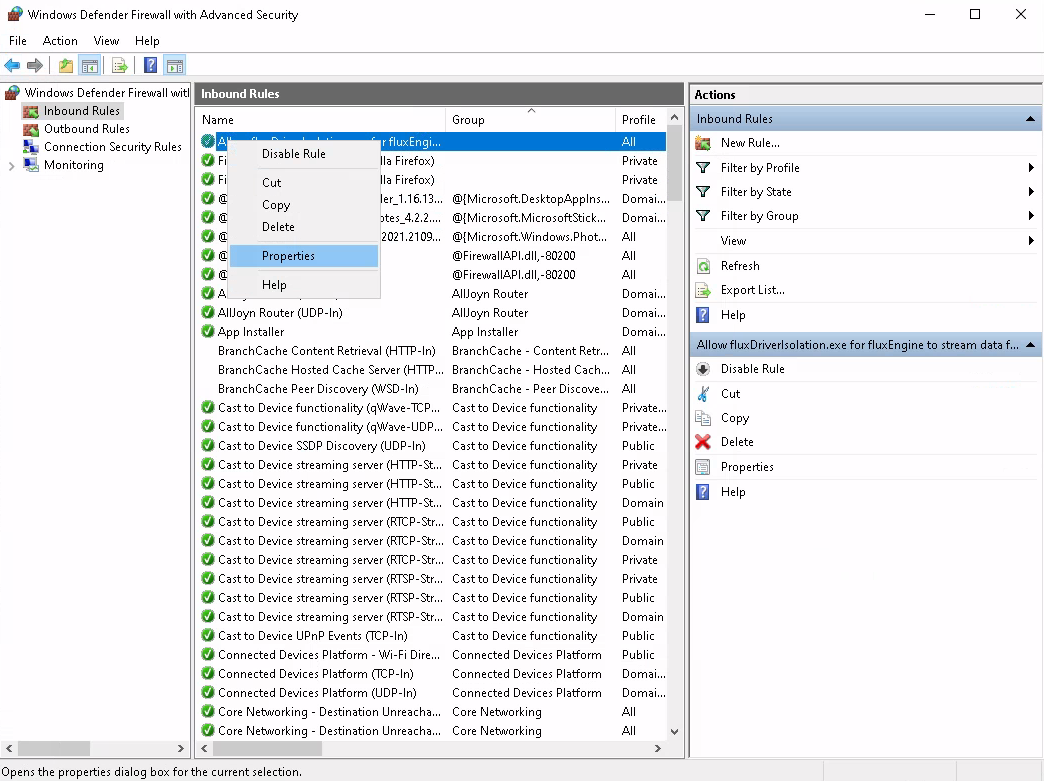
Step 6: Verify the program path in the rule settings
After rule creation please verify that the rule wizard has not
replaced the absolute path that was specified with %USERPROFILE%
again (which would cause the rule to not work). To do so, right-click
on the newly created rule and select Properties:
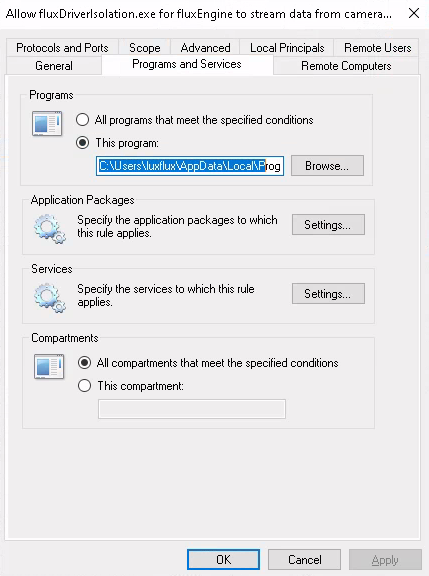
Then go to the tab Programs and Services and verify that the
specified program does indeed have an absolute path that starts with
a drive letter (e.g. C:\):
Optional: Restrict the rule to only UDP
This is optional.
All cameras that are supported by fluxEngine so far use UDP-based
protocols for the network communication, so it is possible to restrict
the protocol type in the Protocols and Ports tab of the rule
properties window to UDP (instead of All Protocols):
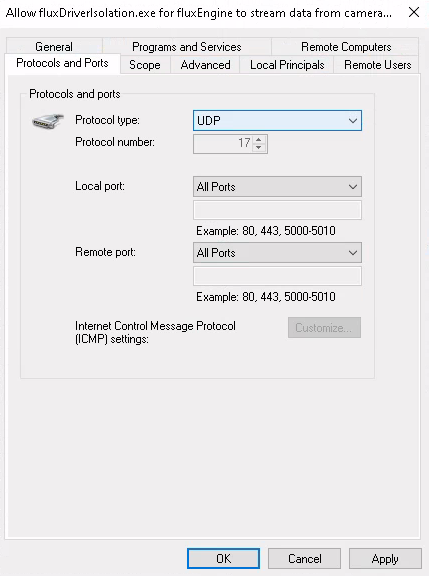
Note that the ports should never be restricted, as many network camera protocols use dynamically assigned port numbers.