Refractive Curve Editor
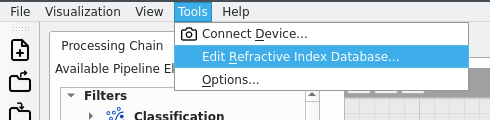
The refractive curve editor may be opened in two different ways. In the Tools menu of fluxTrainer there is an entry Edit Refractive Index Database… that opens the editor and allows the user to edit the database independently of any filter:
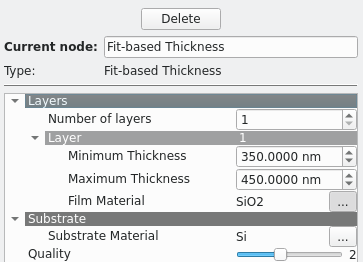
Additionally, any time a material is chosen for either the Film Material or Substrate Material parameters of the Fit-Based Thickness Filter, the database editor also opens:
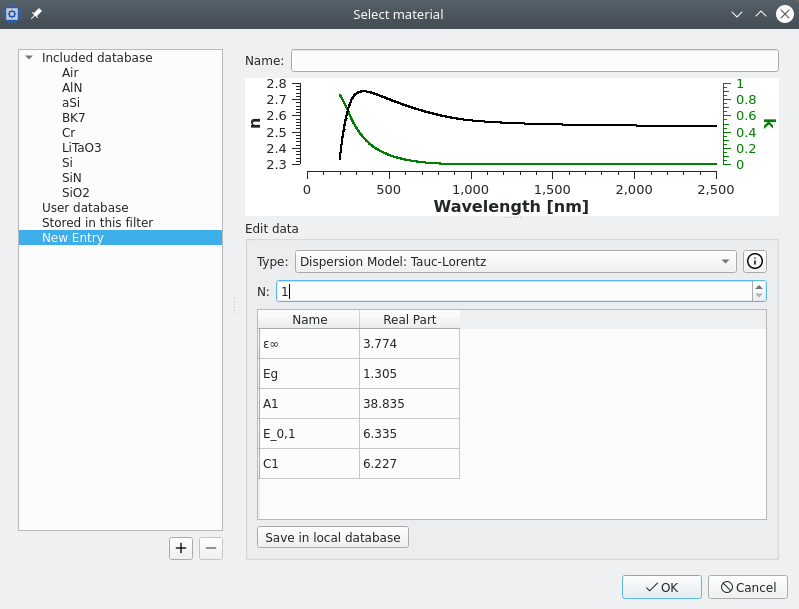
The editor dialog that is opened in this manner will look like this:
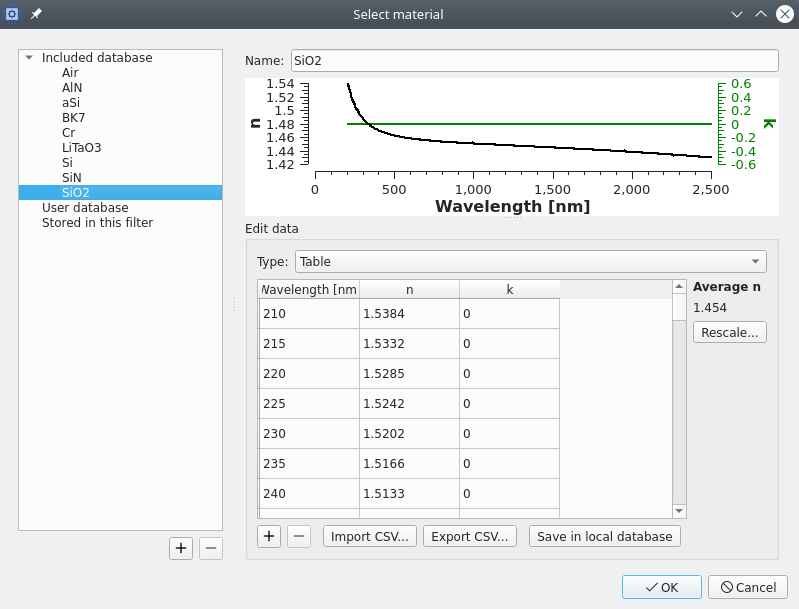
In case the refractive index database editor is opened from the Tools menu there will only be a Close button instead of the OK and Cancel buttonse shown in this screenshot. (See below for more details.)
The editor dialog is divided into two main parts: on the left hand side there is a list of all available materials. There are three sub-sections of materials:
fluxTrainer Pro comes with an included database of some very common materials that the user may choose from. The first category Included database will list all of these materials. The included database cannot be changed by the user. (But the user can make modifications to existing materials and store these modified materials in the user database.)
The user can create their own database of materials that are stored together with the configuration of fluxTrainer. The category User database will list all materials currently present in the user database.
When editing the material properties of a filter parameter it might be the case that the refractive index curve stored in the filter’s parameter might not be in the local database and also not in the list of included materials. In that case the material will be shown underneath the Stored in this filter category. (If the material stored in a filter matches a material in either the user database or an included material, that material will be selected instead when editing the filter.)
At the very top of the right section of the dialog the name of the material is displayed. The user may also change the name of the material if they want to and store it in the user database under that name. Materials within the user database must have a unique name, and reusing the same name will result in fluxTrainer asking whether the previous material should be overwritten.
Below the name of the material the user can view the material’s refractive curve. The preview is updated automatically whenever the user changes the material.
Below the preview of the refractive curve the user can actually edit the material.
Adding a Material
To add a new material (instead of changing an existing one), press the
+ button beneath the list of materials on the lower left corner of
the dialog. It will create a new material without a name and a default
refractive curve that is just a constant:
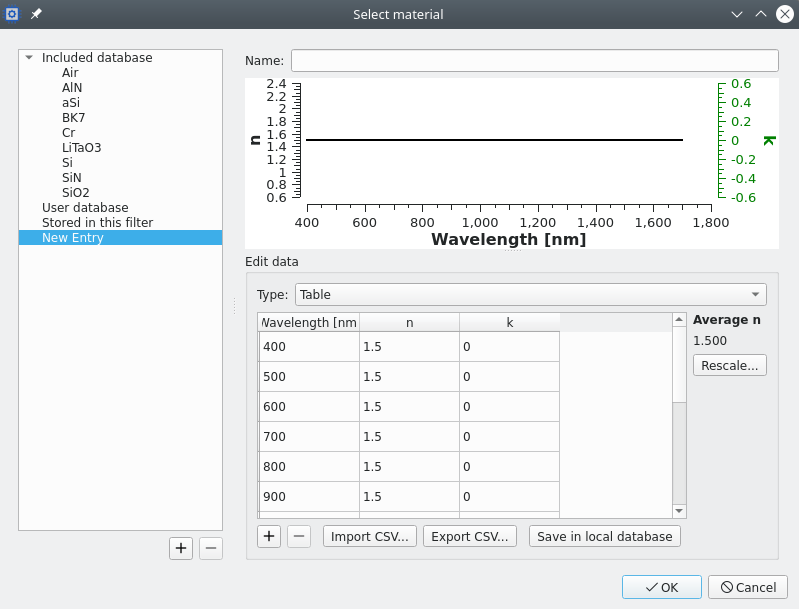
After creating a new material please immediately specify a name for the material. When the curve has been edited to fit the chosen material, the Save in local database button may be used to save the material in the local database.
Removing a Material
Materials in the user database can be removed with the - button
beneath the list of materials on the lower left corner of the dialog.
The user will be asked for confirmation before the material is actually
removed.
Removing a material from the local user database is permanent and cannot be reversed other than by recreating the material from scratch.
Editing Table-Based Refractive Curves
The simplest way to specify a refractive curve is to provide it as
a set of (λ, n, k) tuples in the form of a table. This is
seen in the previous screenshot.
To enter the material in table form please select Table for the Type selection.
Manually Editing the Table
It is possible to manually edit the table directly. Just double-click
on a cell to edit its current value (or use the F2 key while the
cell is selected) and enter the new value.
When changing a wavelength the table is automatically sorted again so that the wavelengths are always in ascending order.
It is possible to add rows to the table by clicking on the +
button beneath the table. It will automatically create an entry at the
end of the table with a wavelength that is one nm larger than the
wavelength of the last row and the same n and k values of the
last row.
Rows may also be removed by clicking on the - button beneath the
table while a cell within a specific row is selected.
Rescaling Table-Based Data
A simple way to add a new material is to take an existing material that has a similar refractive index curve, and to rescale that curve. To the right of the table containing the refractive index curve there is a display that shows the average refractive index over the entire wavelength range. Beneath that there is a button Rescale….
If clicked the user may enter a new average refractive index value. The
entire refractive index curve will be rescaled by the ratio
n_new / n_old, so that the average refractive index is now the value
entered by the user.
Importing CSV
It is possible to import refractive index data in CSV form. The CSV file has to follow the following rules:
There have to be either exactly 3 rows or exactly 3 columns. If there are three columns, the first column is assumed to be the wavelengths in nanometers, the second column the refractive index values and the third column the extinction coefficient values. If there are three rows the same goes, but for rows.
Rows are separated by line-end characters. CRLF, CR individually, and LF individually are all interpreted as line-end characters.
Columns are separated by either (the separator must be consistent throughout the file):
Any number of spaces or tabs
A single comma (
,)A single semicolon (
;)If commas and semicolons are used as separators, any spaces surrounding those will be ignored.
Individual cells may be enclosed in double quotes (
"). It is possible cells must be quotedThe decimal separator is always a dot (
.), never a comma, regardless of the operating system’s localeScientific notation is allowed for numbers (such as
1.5e-3or similar)
The following examples show various CSV files that will be accepted by
fluxTrainer as a valid n/k curve that has a constant value of 1.5
and no extinction coefficient:
100 1.5 0
500 1.5 0
1000 1.5 0
2000 1.5 0
100,1.5,0
500,1.5,0
1000,1.5,0
2000,1.5,0
"100","1.5","0"
"500","1.5","0"
"1000","1.5","0"
"2000","1.5","0"
100;1.5;0
500;1.5;0
1000;1.5;0
2000;1.5;0
100  1.5 0
500 1.5    0
1000       1.5    0
2000              1.5    0
100 500 1000 2000
1.5 1.5 1.5  1.5
0   0   0    0
Exporting CSV
When exporting CSV files they will always be exported as three columns; the first being the wavelength, the second the refractive index, and the third the extinction coefficient.
The column separator will always be a comma. The row separator will always be CRLF. All numbers will be exported in scientific notation.
Predefined Parametrized Curves
It is also possible to specify materials based on parametrized curves. There are three types of predefined parametrized curves that are implemented in fluxTrainer:
Cauchy
Forouhi-Bloomer
Tauc-Lorentz
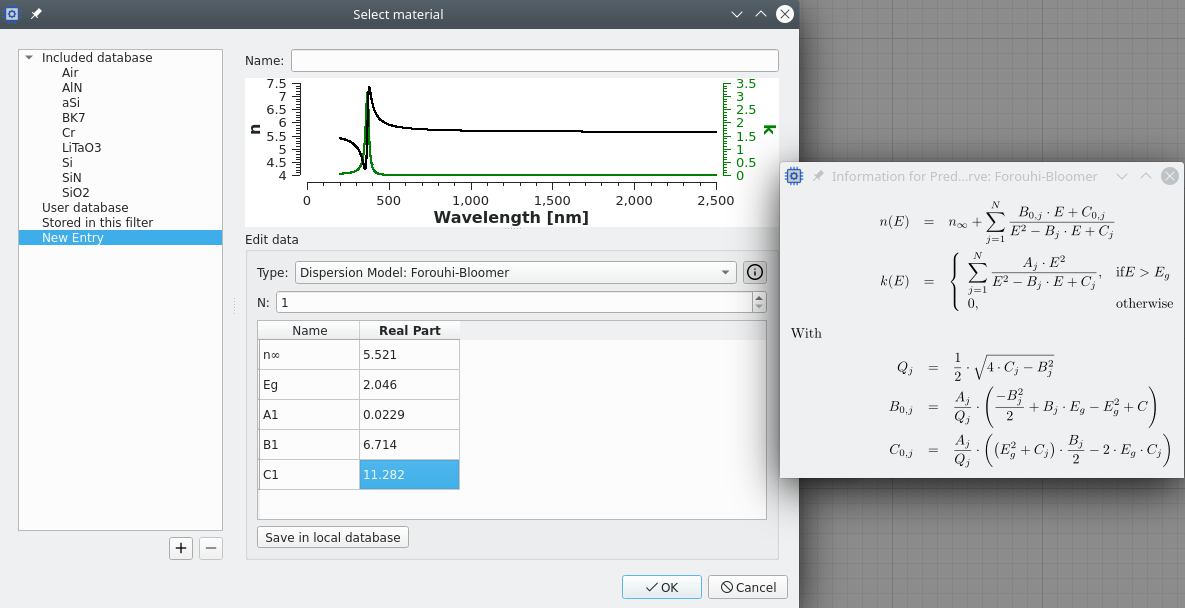
To use the Forouhi-Bloomer dispersion curve, for example, select Dispersion Model: Forouhi-Bloomer in the Type selection of the data entry dialog. This will change the view in the following manner:
Below the Type selection there is now an entry to select the number
of oscillators for a given model, N. Both the Forouhi-Bloomer and
the Tauc-Lorentz curves support having more than a single oscillator.
Setting N allows the user to select how many oscillators are to be
used for the material. Below that there is a table of coefficients that
the user may enter to parametrize the model. Changing a coefficient may
automatically update the preview in the chart above.
Note
If no preview is displayed this means that the coefficients don’t lead to a valid dispersion curve (because e.g. the square root of a negative number is taken).
The coefficients that are available depend on the physical model. If
N is updated the number of coefficients will change. The
coefficients will be numbered accordingly.
Displaying the Formulas of Predefined Curves
It is possible to display the formulas that are used to implement the
predefined curves via the (i) button next to the Type selection.
It will open a new window that shows the formula. You may keep that
window open while you edit the formula and it will remain open until
you close the refractive index curve database editor.
You may also open the windows displaying the formulas of each predefined curve at the same time for comparison purposes.
Custom Parametrized Curves
In addition to predefined curves it is also possible to write custom formulas that parametrize a dispersion curve. To do so, please select Custom Curve for the Type selection:
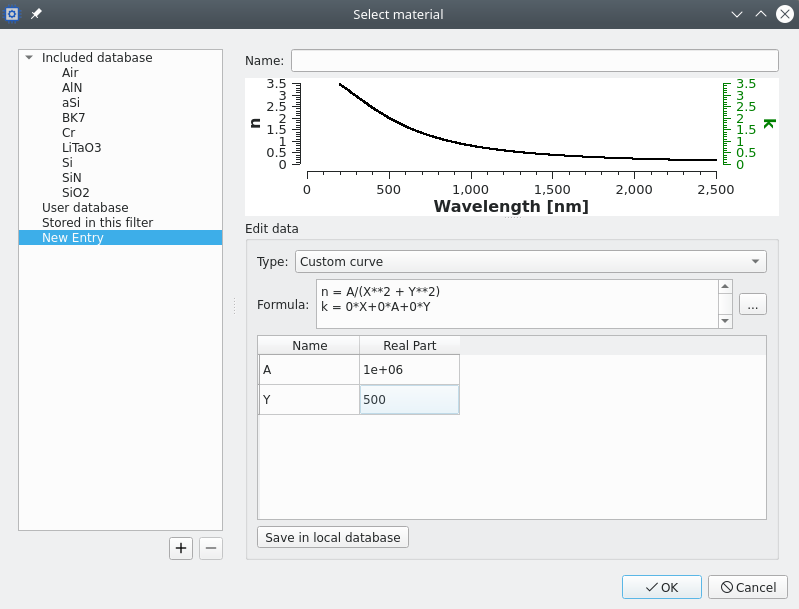
The formula may be edited by opening the formula edit dialog:
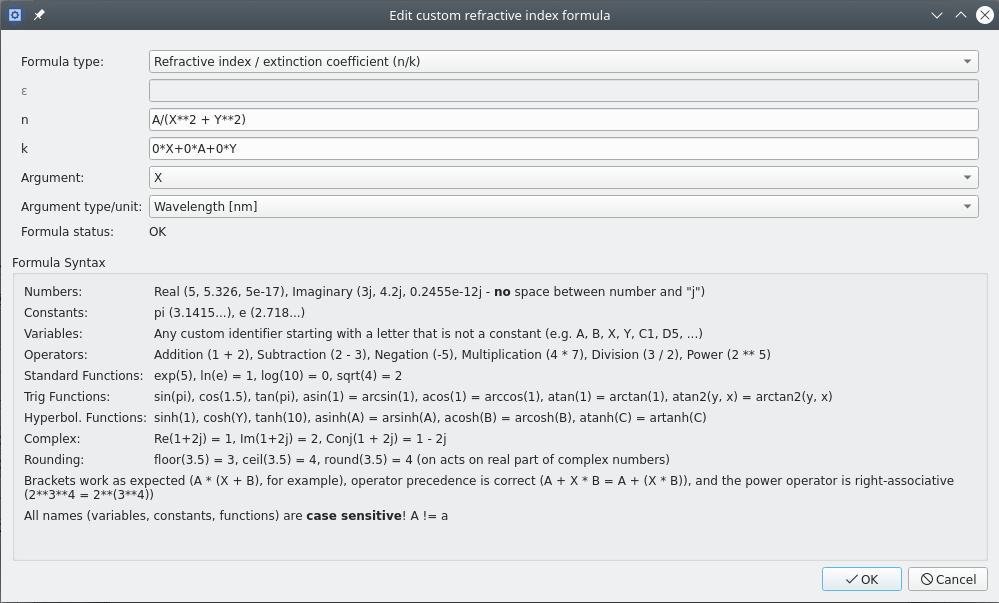
There are two formula types that may be entered:
Separate formulas for the refractive index and the extinction coefficient. These formulas must only use real numbers and directly return the
nandkcurves.A dielectic function
εfrom which the refractive index and extinction coefficient are derived. The dielectic function is a complex function that takes a real part and an imaginary part.After having entered a formula (or two formulas when using
n/k) one must select the variable that is considered to be the argument of the functions. All other variables in a formula are considered to be parameters that the user can change in a table in the same manner as for the predefined curves.The argument type/unit specifies how the argument should be supplied to the formula. There are currently two options: the argument is a wavelength in nanometers, or it is the photon energy in eV.
The formula edit dialog also contains a section that shows a legend that contains the formula syntax that is accepted.
Saving a Material in the Database
To save any changes to a given material, or to save a newly created material in the user database, select the Save in local database button that is displayed beneath the table that is used to edit the material.
If a material with the same name already exists in the database, confirmation will be asked before the material is overwritten.
Selecting a Material for a Filter
Regardless of whether the current material has been saved in the database or not, if the user has opened the refractive index editor in order to select the material for a given filter parameter, the user may use “OK” to update the material stored in the filter.
Curves will always be stored with all data in the project file, irrespective of the local database, in order to ensure that a project file always contains the information required to perform the thickness calculations.